How to create Photo Books in 5 easy steps
October 12, 2020If you are like most people, one of the reasons you are looking at photo management is because you want to create photo books. I love photo books for many reasons and it is one of my favourite parts of photo management because it’s the fun part! But what is the best way to approach that project? Well, read on and let me share my process with you.

Let me say this before we start: the better your digital photos are sorted and enriched with metadata, the easier and faster it will be to create books. However, a well curated photo collection is not always a given. You can still do a photo book, it might just take you a little bit longer, that’s all. So, don’t be discouraged and keep going!
Why are photo books such a great thing?
Photo books are great fun to create, at least that’s what I think. However, there is more to this than meets the eye, there are actually studies that looked into the benefits of photo books or albums.
- Photo books make the memories more tangible. It is of no use if our photos are buried somewhere in the computer. The reality is, most of us never look at them there. Photo books are an easy way to get them out of there and make them more available.
- I strongly believe that photos have the power to connect people. I am luckily not the only one who thinks so, studies have proven that photo books can strengthen relationships. They can spark storytelling and conversations, and they can help us – and especially children – to remember events. It can go so far as to strengthen children’s sense of identity and belonging.
- I love photo books as opposed to the old-fashioned albums because they can easily be replicated. I can create one book and have it printed multiple times and present them to loved ones.
- Digital photos that have been printed in one way or another count as being backed up, hence a photo book is a backup (download my free backup guide from here).
What is your book going to be about?
I think the most often stated goal I hear when talking to clients and people is that they want to create year books. However, here are some other book ideas for you:
• Past trips
• Baby’s first year
• Wedding / Anniversary
• Birthday
• Graduation
• Other special events
• Theme, e.g. house renovation
• Blog
• Family history
• Recipe
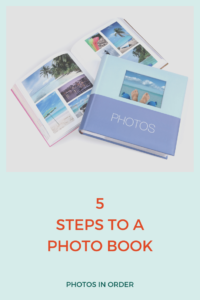
5 Steps to a photo book
Like with anything, it pays to do some planning before you jump into creating a photo book headfirst.
I’ve broken it down into 5 steps for you:
1) Define purpose
2) Choose the software / vendor
3) Select your photos
4) Design your book
5) Enjoy!

1) Define a Purpose
Before you jump online and start searching for a photo book vendor, pause and think about the purpose of your book.
What story do you want to tell? Because that’s what it is … photos tell stories.
Also think about who is your audience … is it a book for yourself and your family? Is it a gift? Is it a coffee table book that visitors will also leaf through?
It is worth taking a moment to think about this because it will guide you through the many decisions that follow.
2) Choose the software / vendor
The second planning step is to choose the right software and with that a vendor i.e. the printing company. This really goes hand in hand.
There are so many options out there, how do you choose one that is right for you? Let’s look at some criteria that is relevant and will help you make a decision. Because not every printer might offer what you’re after and sometimes it takes a little effort to find the one.
Criteria
- Format / orientation
- Size
- Cover
- Paper
- Web-based vs downloadable
- Creative control
- Storage / Saving options
- Budget
I am based in Australia and I like to use local businesses. My absolute favourite one is Momento, a Sydney-based company. Check them out and get 20% off your first book using this link (no affiliation).
3) Select your photos for the book
Choose
- Choose the photos that support the story
- Highlight the favourites, the hero shots
- Gather any other content, e.g. maps, tickets, journals
First of all, you need to choose the photos you want to include in your book. Now, this is not about designing a layout yet. We’ll cover that in the next step when we design the book.
The top principle for this step is LESS IS MORE!
In practical terms, I suggest you create a temporary folder for these photos and COPY them from your photo hub to this temporary folder. Once you’ve got your book in your hands, you can delete that folder again.
So, create that temporary folder, copy all the photos you want to use for the book into it and go to the next step.
Image order
Once you’ve got all your images in that folder, it is time to think about the sequence. Think back to the purpose and to the story you want to tell. The photo sequence should be like a red thread pulling the reader through the book.
I find the easiest way to do this is to add a sequential number before the file names. You can do this in your Finder or Explorer or by using a helpful app such as Adobe Bridge or Lightroom.
4) Design your book
Generally speaking, there is no right or wrong way to design and layout your book, especially if you create books for yourself and are not a photographer who wants to sell a portfolio. Let me share the process I use for my books:
- Create a new project with your chosen software
- Choose a template or start with a blank book
- Choose format and size, paper quality, binding
- Add the photos you have selected
- Design the pages (auto-fill or manually)
- Enhance photos with frames, embellishments, backgrounds
- Include titles, stories and captions
- Create the cover
- Review, review … review and order
Here are 2 extra tips you might want to consider:
- From my experience, the printed books are often a bit darker than they look on the screen. To avoid disappointment, try to lighten dark pictures a bit.
- Also know that most photo book printing companies run specials all the time. So just design your book and wait for the next special to have it printed and you’ll save quite a bit of money.
What’s next? …
5) Enjoy
This part is really, really easy! All you do is to wait for the postman to deliver your beautiful photo book and then you can enjoy and share!
Once you have it in your hands, don’t forget to delete that temporary folder on your computer with the photos you had selected. Otherwise, you might end up with a photo mess.


0 Comments